What is channel mapping?
Channel mapping is a process that allows you to sync your rooms and rates with the third-party channels you connect to. By mapping your channels, you’ll be able to manage updates from one central location.
Channel mapping takes place by using a channel manager, and enables you to connect to more online channels without requiring extra effort, time, or manual work.
This blog will take you through all the crucial steps you need to know to map channels successfully at your hotel.
Table of contents
Why is channel mapping important?
Channel mapping is important if you want to make sure your rooms and rates are being communicated correctly, so you can easily track reservations and performance.
Mapping is also crucial for saving you from spending hours of your time on annoying manual admin. Without channel mapping, you would need to be constantly updating data such as inventory or reservations within your system. Proper channel mapping allows this to be done automatically.
Being empowered by channel mapping and being able to connect multiple online distribution channels is also one of the best ways for your hotel to boost booking and revenue. In turn, this will help your business grow and improve, so you can eventually charge higher rates to produce profit.
More revenue, less work
Channel mapping with SiteMinder’s channel manager is fast, easy, and valuable
Learn more
How does room mapping work?
Room mapping works by assigning particular parameters to your rooms so they can be correctly identified and displayed across all your sales channels.
It’s important that rooms aren’t accidentally duplicated or mapped inaccurately as this can cause problems both for the customer trying to book and for your hotel internally trying to analyse data.
Room mapping often requires a room to be identified by elements such as room type, description, room ID, amenities, ded type, policies, and more.

Shadi Wijaya,
Corporate Director of Revenue
The Phala Group
What are the benefits of hotel room rate mapping?
Room rate mapping sharpens the way you shape demand. When your Deluxe Twin is recognised as the same room everywhere, the performance data that flows back to your dashboard lines up neatly, helping you see which categories sell fastest and at what price point.
That clean feed powers smarter forecasting and gives you the confidence to launch flash deals or add-on bundles on selected OTAs without worrying about mixed-up descriptions.
Guests benefit too. Every listing shows the same photos, amenities and policies, so expectations match reality and front-desk teams spend less time untangling surprises.
The result is a distribution ecosystem you can tweak in real time, cutting out noise and focusing on strategies that lift both conversion and guest satisfaction.
How do you set up channel mapping? A step-by-step guide
Why channel mapping matters:
- Real-time sync eliminates errors: Connecting your channel manager to your PMS updates inventory, rates, and restrictions instantly across all platforms, preventing double bookings and pricing discrepancies
- Accurate mapping expands reach: Correctly linking each room type and rate plan to OTA listings maximises visibility and captures bookings at optimal prices
- Speed beats competition: Automated mapping lets hotels launch flash deals and adjust rates across all channels in minutes while competitors update manually
Channel mapping requires initial setup time but delivers immediate returns through automated operations. Platforms like SiteMinder guide you through each step, ensuring proper connections between your systems.
Here’s the complete process:
Step 1 – Add channels and create room rates
You can’t map channels or rooms if they don’t exist yet, so your first step when using a channel manager is to add the channels you wish to connect to, and also create the room rates that you want to list for sale.
It’s important that room and rates are configured in the same way on your platform and on your channel extranet – to avoid issues like double-bookings.
Step 2 – Map your rates to a channel
Once your channels are connected, and your rates created, they’ll be available for mapping within your SiteMinder platform.
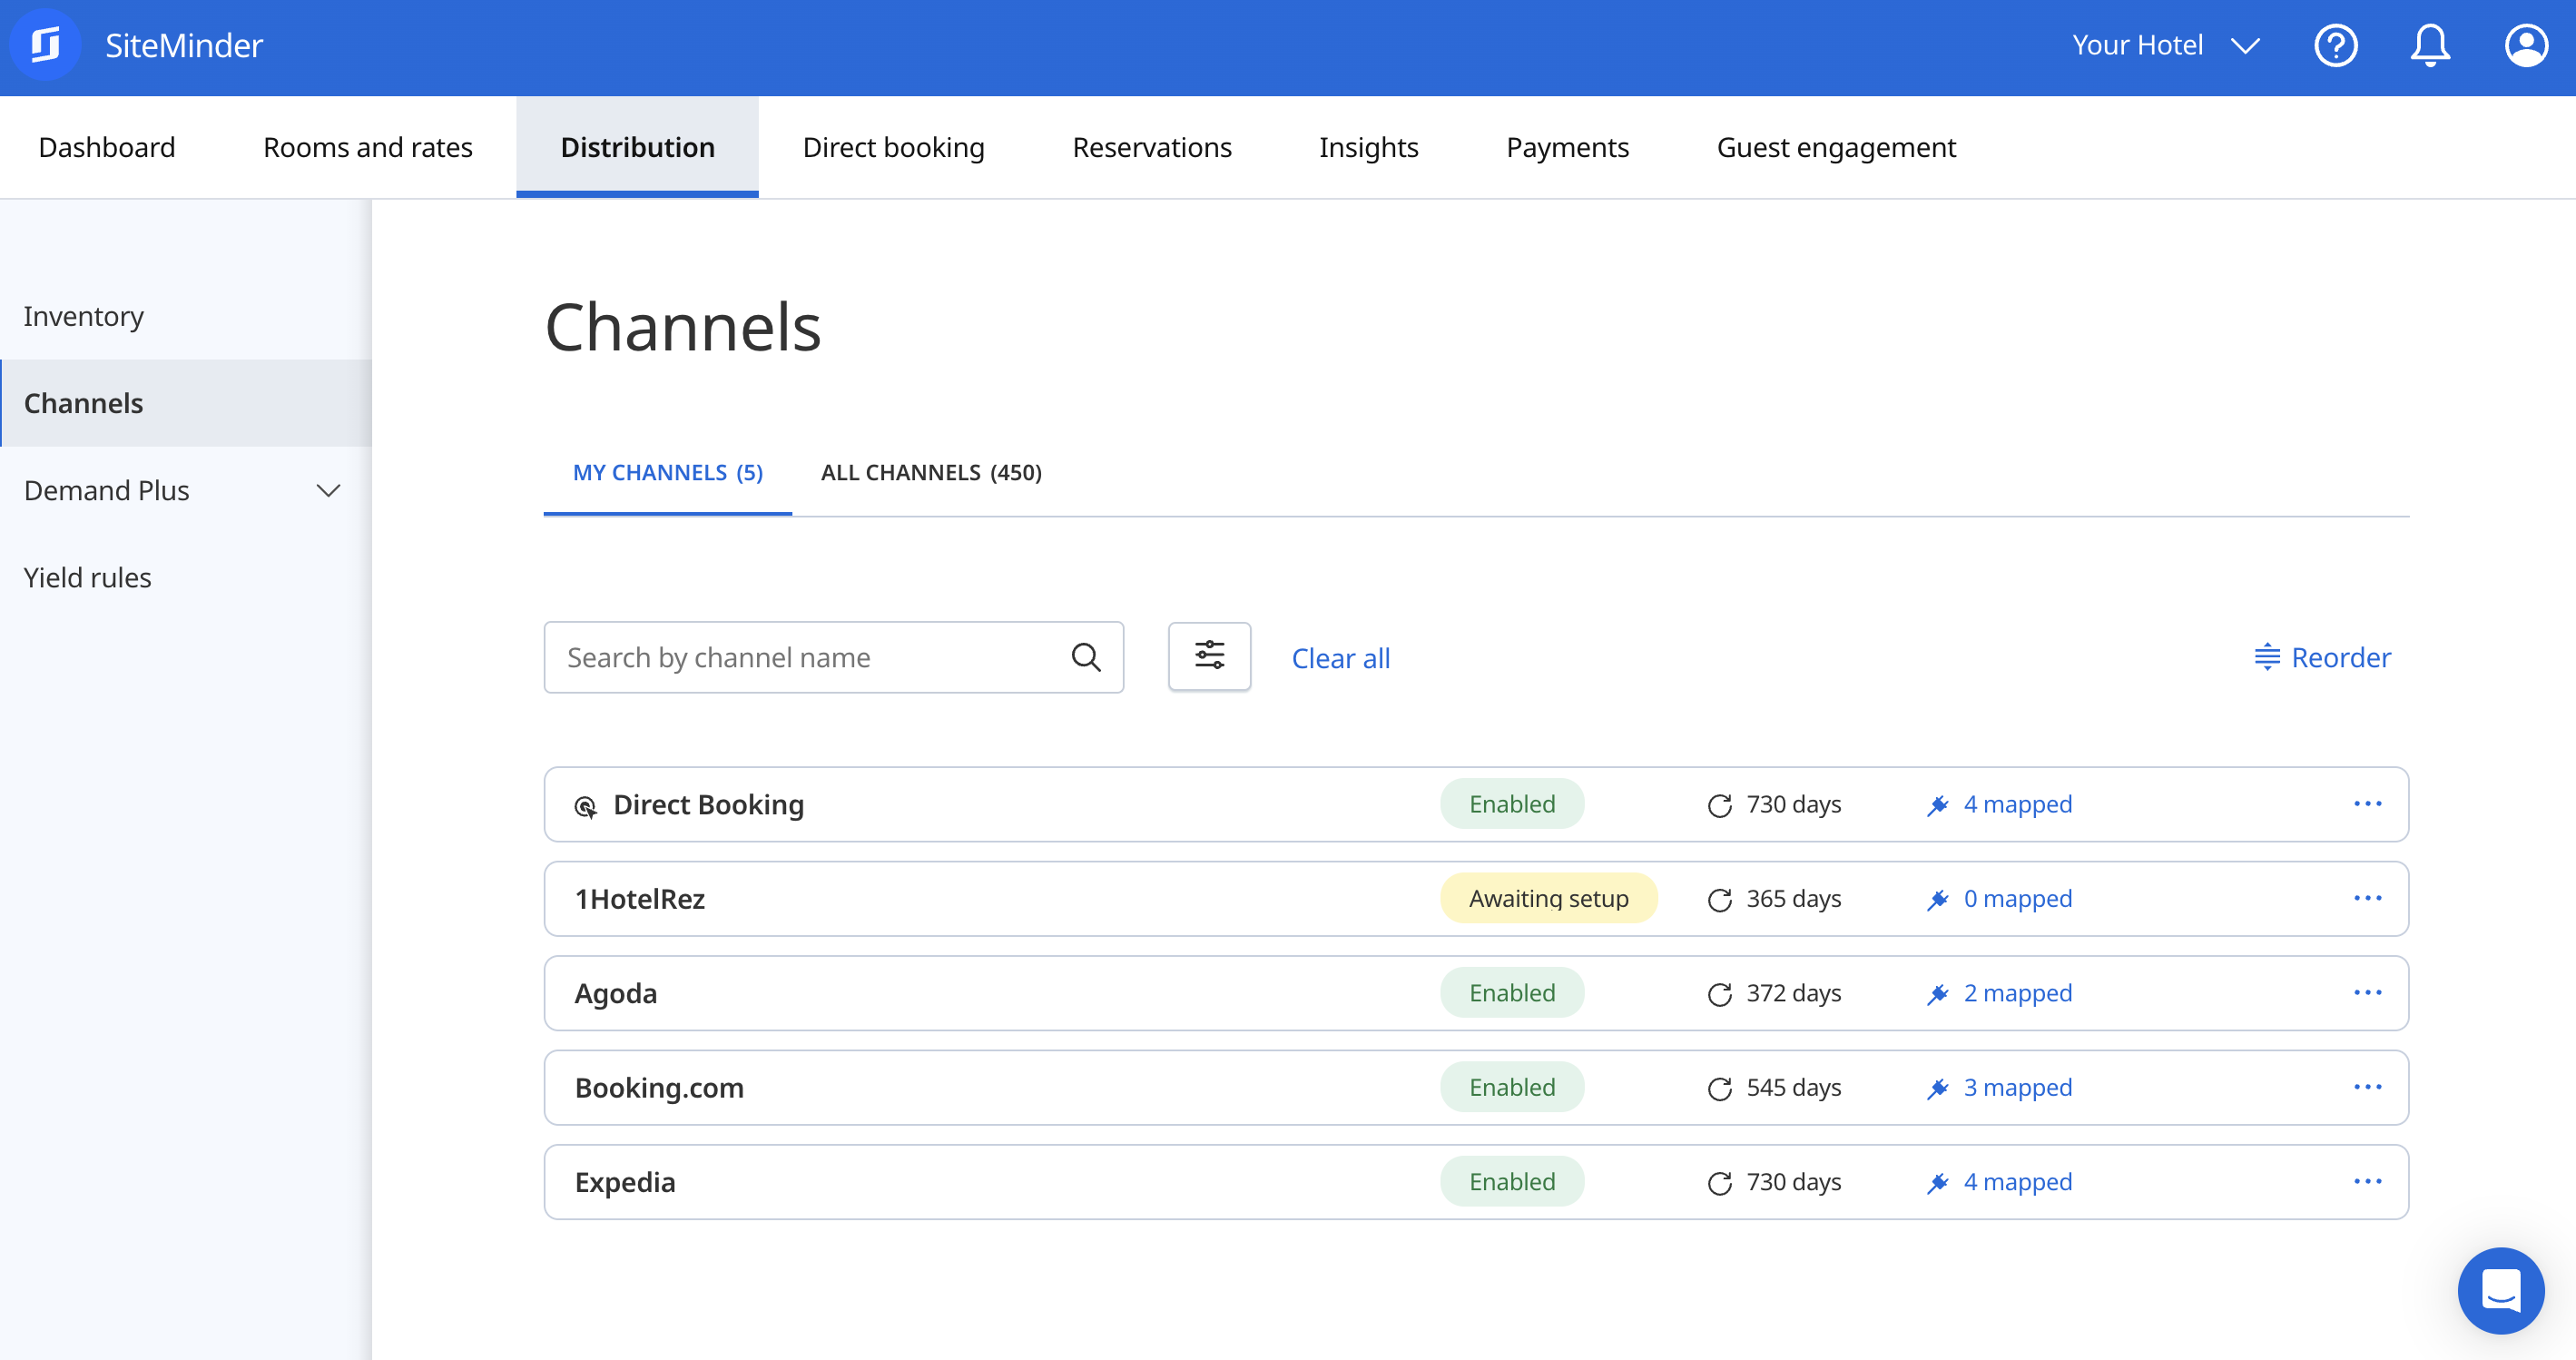
- Go to Distribution > Channels tab
- On the My channels tab, locate the channel
- Select Edit room rates mapping
- Use the Mapping status toggle to select All or Unmapped
- Locate the platform room rate and click on its Map to button
- Start updating channel – select Yes to begin updating rates, availability, and restrictions
- Mapped to – select the corresponding channel rate from the drop-down menu
Save your configuration.
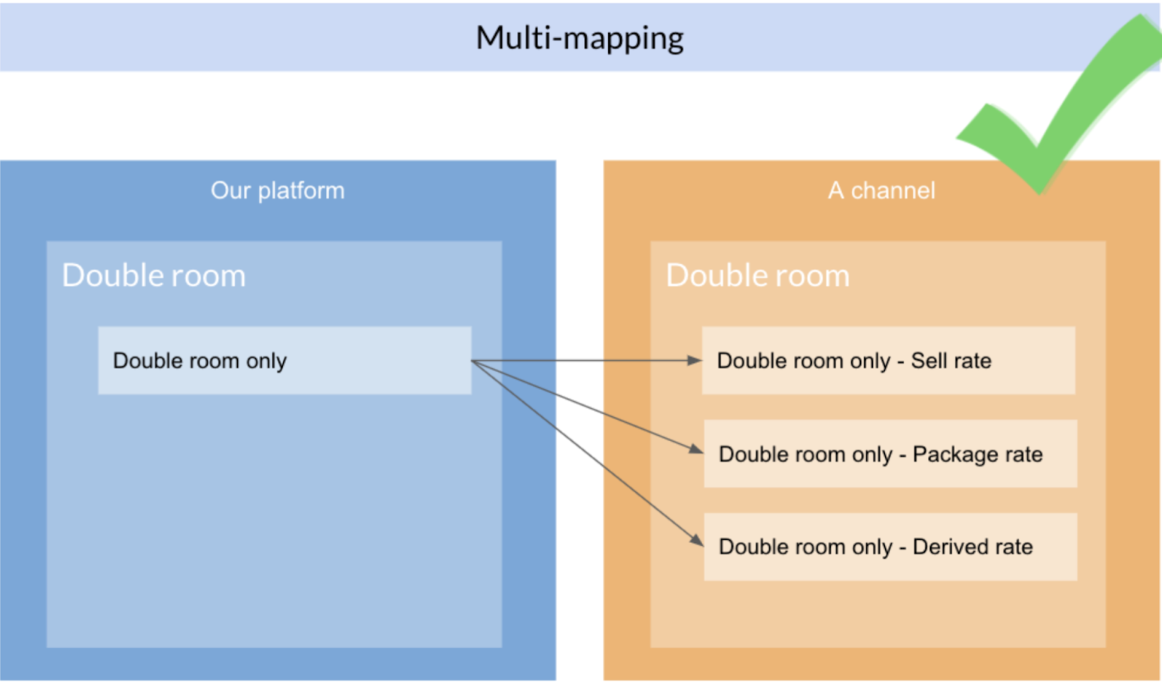
Step 3 – Multi-mapping
You can also ‘multi-map’ a channel room rate. This is to simplify the instances where you want to sell the same room at different rates. For example; by itself, as part of a package, or linked to a promo.
- Go to Distribution > Channels tab
- On the My channels tab, locate the channel to map
- Open the Channel actions menu
- Select Edit room rates mapping
- Use the Mapping status toggle to select All or Mapped
- Click on the rate to map, and then on its Map to <channel name> button
- In the Channel rate configuration window:
- Start updating channel – select Yes to begin updating rates, availability, and restrictions for this channel rate
- Mapped to – select the corresponding channel rate from the drop-down menu
- Save your configuration.
Step 4 – Check that channel rates are mapped
Once you’ve completed the above steps, it’s a good idea to make sure you haven’t missed anything.
On the Rooms and rates mapping tab, check the Rates mapped numbers.
- If the numbers match (example: “2 of 2”) – there are no rates to map.
- If the numbers are different (example: “0 of 10”) – there are still some rates to map. Filter on Mapping status > Unmapped
Step 5 – Enable all your channels and rates
- Check that all recently mapped rates show the correct values for rates and restrictions when filtering per channel. Go to the Inventory page to make a manual or bulk update.
- Once mapping is done, and rates, availability, and restrictions are checked, you are ready to manage the channel from the platform. Go ahead and enable it.
You can always update or disconnect your channel mapping too. Simply go to your Distribution > Channels tab.